Hey there, fellow garden enthusiasts! I'm a supplier of watering cans, and I know how frustrating it can be when your trusty watering can spout breaks. But don't worry, I've got you covered with some simple steps to fix that broken spout and get your watering can back in action.
First things first, let's talk about why a spout might break in the first place. Sometimes, it's just wear and tear from regular use. Maybe you've accidentally knocked the can against something, or the spout has been bent or twisted over time. Other times, it could be a manufacturing defect, although that's less common. Whatever the reason, the good news is that in most cases, you can fix the spout yourself without having to buy a whole new watering can.
Step 1: Assess the Damage
The first step in fixing a broken watering can spout is to take a good look at the damage. Is the spout cracked, broken off completely, or just loose? This will help you determine the best course of action. If the spout is just cracked, you might be able to repair it with a little glue or tape. If it's broken off completely, you'll need to replace it. And if it's just loose, you might be able to tighten it up with a screwdriver or pliers.
Step 2: Gather Your Tools and Materials
Once you've assessed the damage, it's time to gather the tools and materials you'll need to make the repair. Here's a list of some common items you might need:
- Glue: If the spout is cracked, you'll need a strong adhesive to hold it together. Epoxy glue or super glue are good options.
- Replacement spout: If the spout is broken off completely, you'll need to find a replacement. You can usually find replacement spouts at your local hardware store or online. Make sure to choose a spout that is the right size and shape for your watering can.
- Screwdriver or pliers: If the spout is loose, you'll need a screwdriver or pliers to tighten it up.
- Sandpaper: If you're using glue to repair the spout, you'll need to sand the surfaces to be glued to help the glue adhere better.
- Safety glasses and gloves: It's always a good idea to wear safety glasses and gloves when working with tools and glue to protect your eyes and hands.
Step 3: Repair a Cracked Spout
If the spout is just cracked, you can usually repair it with a little glue. Here's how:
- Clean the cracked area: Use a clean cloth to wipe away any dirt or debris from the cracked area. Make sure the surfaces are dry before you start gluing.
- Sand the surfaces: Use sandpaper to lightly sand the surfaces to be glued. This will help the glue adhere better.
- Apply the glue: Apply a small amount of glue to one of the surfaces to be glued. Then, press the two surfaces together firmly and hold them in place for a few minutes until the glue starts to set.
- Let the glue dry: Follow the instructions on the glue package for drying time. It's usually a good idea to let the glue dry overnight to ensure a strong bond.
- Test the spout: Once the glue is dry, fill the watering can with water and test the spout to make sure it's working properly.
Step 4: Replace a Broken Spout
If the spout is broken off completely, you'll need to replace it. Here's how:
- Remove the old spout: Use a screwdriver or pliers to remove the old spout from the watering can. If the spout is held in place with screws, remove the screws. If it's held in place with a clip or bracket, remove the clip or bracket.
- Clean the area: Use a clean cloth to wipe away any dirt or debris from the area where the old spout was attached. Make sure the surfaces are dry before you start installing the new spout.
- Install the new spout: Insert the new spout into the hole in the watering can. If the spout is held in place with screws, insert the screws and tighten them with a screwdriver. If it's held in place with a clip or bracket, attach the clip or bracket.
- Test the spout: Once the new spout is installed, fill the watering can with water and test the spout to make sure it's working properly.
Step 5: Tighten a Loose Spout
If the spout is just loose, you might be able to tighten it up with a screwdriver or pliers. Here's how:
- Locate the screws or clips: Look for the screws or clips that hold the spout in place. They are usually located at the base of the spout.
- Tighten the screws or clips: Use a screwdriver or pliers to tighten the screws or clips. Be careful not to overtighten them, as this could damage the spout or the watering can.
- Test the spout: Once the screws or clips are tightened, fill the watering can with water and test the spout to make sure it's working properly.
Other Garden Supplies You Might Need
While you're fixing your watering can, you might also want to consider investing in some other garden supplies to make your gardening experience even better. Here are a few suggestions:
- Bird Shape Waterer For Plants: This cute and functional waterer is shaped like a bird and can add a touch of whimsy to your garden. It's also a great way to water your plants without getting your hands wet.
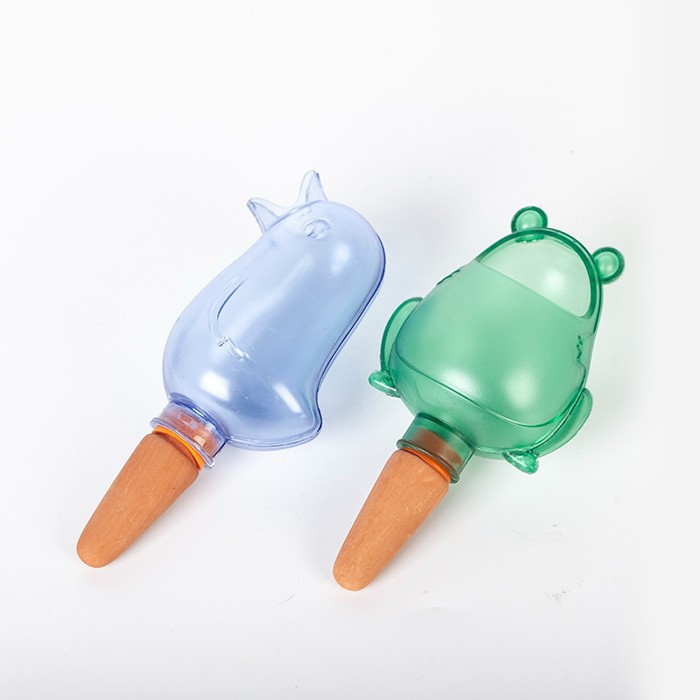
- Animal-Shaped Watering Spikes: These fun and practical watering spikes are shaped like animals and can help you water your plants more efficiently. They are easy to use and can be inserted directly into the soil.
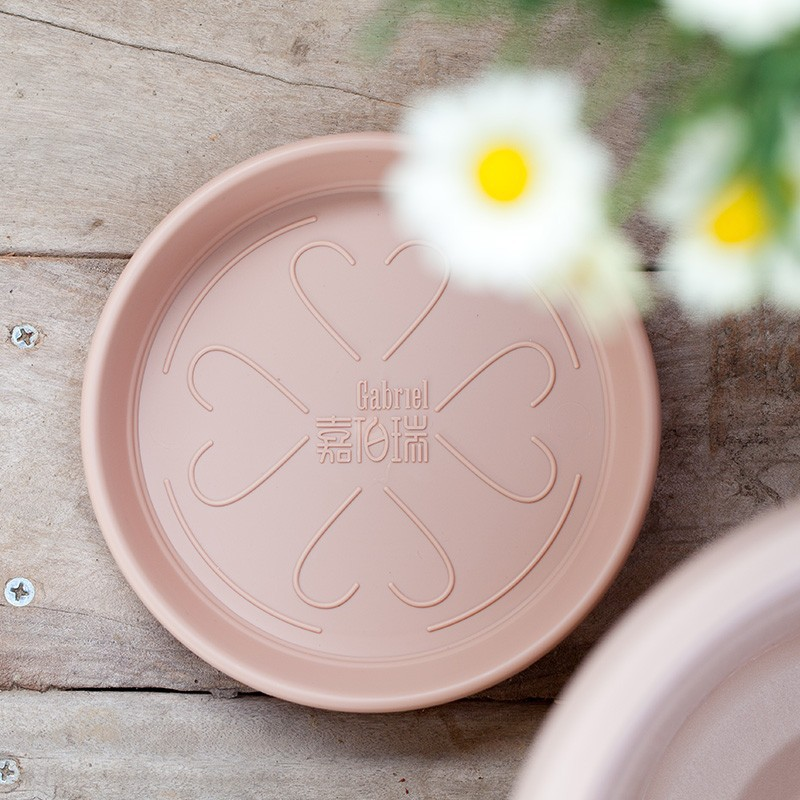
- Drip Trays For Flower Pots: These trays are designed to catch excess water from your flower pots and prevent it from spilling onto your floors or furniture. They are available in a variety of sizes and styles to fit your needs.
Conclusion
Fixing a broken watering can spout doesn't have to be a difficult or expensive task. With a little know-how and the right tools and materials, you can easily repair or replace the spout and get your watering can back in action. And if you're looking for other garden supplies to make your gardening experience even better, be sure to check out our Bird Shape Waterer For Plants, Animal-Shaped Watering Spikes, and Drip Trays For Flower Pots.
If you're interested in purchasing any of our products or have any questions about our watering cans or other garden supplies, please don't hesitate to contact us for a procurement discussion. We're always happy to help you find the right products for your needs.
References
- Home Depot. "How to Fix a Broken Watering Can Spout." Home Depot website. Accessed [date].
- Lowe's. "Repairing a Watering Can Spout." Lowe's website. Accessed [date].


